template

Showing posts with label Crafts. Show all posts

Thursday, August 9, 2012

Reader's and Writer's Notebooks

Hello and Welcome to AUGUST!!

Can you believe it is already August!?  Where did the last 2 months go!?  I don't know about all of you, but while I love summertime, I am secretly excited about getting back into the swing of things.  Shhh....don't tell.

Anyway, in preparation for next year, I spent some time making sample Reader's and Writer's notebooks for my kids to see before the make their own this year.   And, for your viewing pleasure, I have included a step by step guide for you!  **Also, in keeping with my "save money" theory that I am trying to stick with this year, all of the materials that I used were scrounged up in my classroom and at home. 

Step 1:  Start out with a marble notebook, construction paper, scissors, marker, glue, and tape.  I ask my kids to bring in marble notebooks, but a notebook with rings would be fine too:)

Step 2:  Decide how you would like your students to divide their notebooks.  I decided for my reading notebook, that I would have 4 sections:  Notes (10 pages), Class Work (30 pages), My Reading (30 pages), and Guided Reading (30 pages).  You should know this in advance so that you do not allot too many pages to any one section. 

Cut the construction paper to fit the size of the pages in the notebook.  Fold that page to make 2 triangles.  They will not "line up".


Step 3:  Cut the paper into 2 triangles.  You will need to do this for as many dividers as you want to have.  I have 4 triangles, which took two sheets of construction paper.


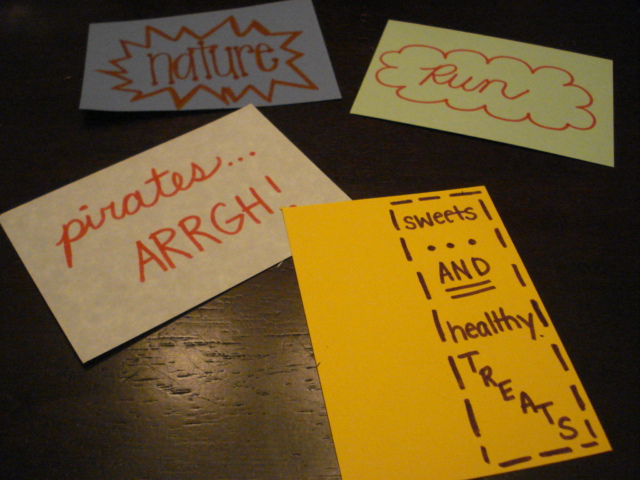
Step 4:  Label the construction paper with the headings that you would like them to have.  I used red marker to match the red front of my notebook, and I chose to have all of the dividers look the same, to make the notebook more cohesive.


Step 5:  Glue the pages down only around the two edges that are on the sides of the notebook.  (This will be the two sides which make a right triange.)  I also used tape to reinforce.  The construction paper should make a pocket on the page.

You can see the tape on the side of the page.  This will help ensure the construction paper does not fall out or peel up.
This is how the paper will serve as a pocket.
Step 6:  Repeat the steps for the remainder of the pages in the notebook.  Use the extra construction paper to create a title for the front of the notebook.  I chose for my title to match the rest of the dividers in the notebook.


**For my writing notebook, I followed the same process.  I chose to have 3 sections in the writing notebook:  Notes (10 pages), Writing (All pages in the middle of the notebook), and Words (the last 4 pages).  I used a word wall template on the last four pages for students to record new vocabulary and tricky words to use as a reference when they are writing.  There are pictures of the Writer's Notebook below.

Writer's Notebook

dividers

Individual Word Wall for each notebook
Finished Products!
Best of Luck on getting everything ready for the year! 


Thursday, July 26, 2012

Reader's Notebook Book Box Project

Good Morning Bloggies!

This year, I have decided that I want to get more organized with my reader's notebooks that my kids are using.  In the past, they have kept their notebooks in their desks, but I am sure you all know that notebooks get torn up and lost so easily that way.  I have been perusing the web, and have seen lots of magazine boxes and plastic bins being used to hold the reader's notebooks, and that is the route I decided to take.

Problem.

I cannot afford to buy 25 plastic bins for my kids.  Now I know there are cheap options, and I also know that a dollar goes a long way at the dollar tree.  But, I just wanted to make this happen for FREE. 

like, totally free

Cue Homemade Reader's Notebook Book Box Project!  I have been saving up cereal boxes, and the kids are I are going to personalize our own book boxes next year.  Last night, I created my own "sample" book box to show the kids (and you) how to make them!

Step 1:  Scrounge up magazines, pictures, a cereal box, modge podge and a paint brush, construction paper, scissors, glue sticks, and markers.  I used washable markers, and ended up wishing I had gone with Sharpies or other permanent versions.


Step 2:  Cut down your cereal box to the shape of a magazine holder.

Step 3:  Cut out pictures from magazines and select personal photos to glue to the box.


Step 4:  Use glue sticks to stick all of the pictures on the box, and trim the pictures so that they are not sticking off the sides of the box.


Step 5:  Make cutesy word labels to describes the reason for choosing the pictures you chose.  Ex:  I wrote "run" and stuck it by the running pictures because I enjoy running.  You could certainly tie an inference lesson into this part of the craft.  Students could ask others use their box to infer their interests!


Step 6:  Glue the words onto your box using the glue sticks.


Step 6:  Modge Podge the box using a small paintbrush or sponge brush. 

**Note:  I used washable markers, and my words bled when I modge podged them.  In retrospect, I would either use sharpies or NOT modge podge over the paper pieces that I drew on.


All Done!!  Your dried finished product will be ready to hold books and notebooks, and is a much more personalized version of the book box than a plastic bin!


Catch ya later!  I have a lot of cereal to eat!


Tuesday, December 27, 2011

Charlie and the Chocolate Factory FREEBIE!


Happy (almost) New Year!  To ring in the new year, I want to share an activity that I have done with my kids for the past two years.  It is a Charlie and the Chocolate Factory Project that we do at the completion of the CATCF novel. The project covers the topics of summarization, letter writing, descriptive narratives, and adjectives.   I would love to share my template and directions with you if you are interested in the project.  STEP 1:  Follow my blog, and STEP 2:  leave a comment with your email address.  Once you have done that your CATCF freebie will be on it's way!  The kids LOVE making these characters, and they always turn out so darn cute!  Here are a few pics of our projects!


Monday, December 19, 2011

WE MADE IT!

It's the most wonderful time of the year!  Christmas break!  I sure do LOVE teaching around Christmastime, but I sure do LOVE when we get a nice long break too!  Here are a few highlights from our last week of school!

Christmas around the world:  Welcome to France!! My teammates and I each took one country to teach to our classes in a rotation, and I was in charge of France!  Here are a few pictures from the day-
Noel Banners with construction paper, glue, and glitter


File folder passports

Yules Logs-Swiss Rolls:)

French "Yule Logs"

Yummy!
Reindeer Hands and Feet- This must be the oldest craft in the book, but my kids loved it!  And they definitely personalized all of the reindeer! So stinkin' cute!


And-as promised, pictures of our cinnamon ornaments!  Mix Cinnamon, applesauce, glue, and a little water for some amazing smelling ornaments!


Merry Christmas Everyone!!

Sunday, December 11, 2011

Revisiting the Glory Days.....and apple cinnamon ornaments!

My husband and I were hanging out with some of our friends tonight, laughing about "the good ole' days"-or the "not so good ole' days" depending on which story we are telling at the time:) HA!  When we got home I was perusing through old pictures, and what should I find but a video of us back at cheerleading practice! (My husband and I met on a college cheer team-GO PIRATES!)  Anyway-have a chuckle for yourself!


Anyway-at school this past week we dug into the vivid vocabulary from the Polar Express!  So far so good!  My kids and I are pushing through these last couple of weeks until Christmas, and I am sure that you are too!  I am taking the whole Elf on the Shelf thing really seriously:)  If you are interested in my Polar Express Unit, check it out here!  There is still time to do the unit before Christmas! 


We are also going to be making Cinnamon applesauce ornaments.  The recipe is super easy, the room smells amazing when they are done!  I'll be posting my own pictures and recipe next week, but if you want to try it with your own kiddos, I found a great blog about it called 5 orange potatoes. Check it out:


Have a fabulous week!

Sunday, May 15, 2011

Last few weeks....What do I do.....PLUS A FREE DOWNLOAD!!

With EOG's being next week, I feel like I have crammed in everything that I am supposed to teach already, but there are still four weeks left of school!  Clearly, I am going to have to get creative with what I am using for instruction, since my regular classroom materials are all used up:(  Another wonderful benefit of standardized testing.....

Anyway, I have decided to start creating my own learning units.  I got really ambitious this weekend and created a social studies unit about Cesar Chavez.  Check it out at Teachers Pay Teachers!  It is a FREE unit, so please download and check it out!  All I ask is that if you do download, leave me a comment letting me know!!

In other end of year news, we have been pushing through to get ready for testing.  My co-worker found several EOG prep passages that were "instructions/directions passages", so we decided to make and do all of the activities!  This was definitely a hit with the kids!  See pictures below....

Making Smoothies


Good Earth Necklaces


Thursday, May 5, 2011

Cinco de Mayo!!

I love Cinco de Mayo!!  It is a super fun holiday, and always makes my hispanic population feel really special!  This year, I tried several different crafts and activities for teaching Cinco de Mayo that the students really loved!

We started off by learning about the holiday itself, and finding out more about why we celebrate Cinco de Mayo.  The kids learned about symbols that remind us of the holiday, and colored pictures of the symbols.  We put the symbols on a circle map!


After we finished our circle map, we made sombreros!  My co-worker had the cute idea of gluing paper cups onto paper plates and decorating them with cotton balls to make sombreros.  The kids loved this, and tried to balance them on their head all day!!


One of my little sweeties with her sombrero on!

 After we made sombreros, we watched a short video clip to learn more about cinco de mayo.  We also had a small fiesta with chips and salsa! The best part about the whole fiesta was that I was able to purchase everything that I needed at the Dollar Store (except for the chips and salsa).  I really wanted to find a pinata to use, but unfortunately I couldn't find one:(  But not to worry!!  A couple of my Hispanic kids were proud to say that their parents make pinatas, and would love to bring one in!!  I just loved the way that those students took so much ownership of their heritage today!!